Adobe Photoshop, a cornerstone of digital image manipulation, is a powerful tool for both beginners and seasoned professionals. This in-depth look at Adobe Picture Editor unveils its evolution, features, and practical applications, from basic image editing to complex photo manipulation. We’ll explore its capabilities across different versions, compare it to other industry-leading editors, and delve into its user-friendly interface.
This guide provides a detailed overview of the software’s functionalities, outlining its key features, tools, and workflows. We’ll examine how Adobe Picture Editor integrates with other Adobe Creative Cloud applications, discuss its performance and system requirements, and offer valuable learning resources for mastering this versatile tool.
Introduction to Adobe Picture Editor
Adobe Picture Editor, now a cornerstone of digital image manipulation, has evolved significantly over the years. Initially focused on basic image editing, the software has expanded its capabilities to encompass complex photo manipulation and creative design tools. Its robust features and user-friendly interface have made it a popular choice among photographers, graphic designers, and hobbyists alike.
The software’s adaptability and continuous updates have ensured its relevance in the ever-changing digital landscape. Its ability to cater to diverse user needs and skill levels has been a key factor in its sustained popularity.
Overview of Functionalities
Adobe Picture Editor offers a comprehensive suite of tools for image editing and manipulation. Core functionalities include image resizing, color correction, and basic retouching. Advanced features encompass layer management, masking, and blending modes, enabling users to create intricate composite images. The software also provides tools for creating and manipulating vector graphics, and for exporting images in various formats. Furthermore, it integrates with other Adobe Creative Cloud applications, streamlining workflows and enhancing creative potential.
Evolution of the Software
The evolution of Adobe Picture Editor has seen a gradual but significant enhancement of its features. Early versions focused primarily on basic image editing, with limited options for color correction and resizing. Subsequent versions introduced more advanced tools, such as layer editing and masking capabilities, allowing users to create more complex and refined images. Integration with other Adobe products has also been a key aspect of the software’s evolution, providing seamless workflow between different creative applications.
Different Versions and Capabilities
Adobe Picture Editor has undergone several iterations, each with its own set of features and capabilities. The software has continuously evolved to incorporate user feedback and address industry trends, leading to a more sophisticated and powerful image editing tool over time. This iterative approach has led to a wide range of features and tools, catering to diverse user needs.
Target Audience and Use Cases
The target audience for Adobe Picture Editor is diverse, encompassing professional photographers, graphic designers, and hobbyists. Common use cases range from basic image editing for personal use, such as retouching photos, to complex image manipulation for professional projects, like creating illustrations and graphics. The software’s versatility allows users to perform various tasks, such as enhancing images, creating composites, and manipulating colors.
Key Features Across Versions
| Feature | Version 1 | Version 2 | Version 3 |
|---|---|---|---|
| Image Editing | Basic adjustments (brightness, contrast, color balance). | Enhanced adjustments (curves, levels, color grading). Introduction of basic layer management. | Advanced layer management with blending modes, masks, and non-destructive editing. |
| Photo Manipulation | Limited photo manipulation tools. | Expanded photo manipulation tools (selective adjustments, cloning). | Sophisticated photo manipulation (advanced retouching, composite image creation). |
Comparison with Other Picture Editors
Adobe’s Picture Editor, while a powerful tool, sits within a crowded landscape of photo editing software. Understanding its strengths and weaknesses in comparison with other popular options is crucial for making an informed decision. This section delves into key distinctions, focusing on features, pricing, and user experience.
Comparison of Key Features
Several photo editing software options cater to diverse needs and skill levels. Comparing features, pricing, and user interfaces is essential for choosing the best tool. A comprehensive overview highlights crucial aspects for potential users.
- Adobe Picture Editor, as a part of the Adobe Creative Cloud suite, boasts a wide array of tools, including advanced editing capabilities, robust filters, and seamless integration with other Adobe products. However, this extensive feature set often comes at a premium price.
- Competitors like GIMP, a free and open-source program, offer a robust feature set comparable to Adobe Picture Editor, but without the subscription model. Its user interface might be less intuitive for beginners, and integration with other applications is limited.
- Other professional-grade editors, like Affinity Photo, provide a strong alternative to Adobe, offering a comprehensive suite of features at a more affordable price point than the Adobe suite. Affinity Photo’s user interface, while intuitive, may not match the extensive customization options available in Adobe Picture Editor.
Pricing Models and Subscription Options
The pricing model significantly influences the choice of photo editing software. Understanding the different tiers and options is essential for budgeting.
- Adobe Picture Editor, as part of the Adobe Creative Cloud, operates on a subscription-based model. This allows users to access a broad suite of applications but necessitates ongoing payments. The subscription tier often dictates access to specific features and tools.
- Free software like GIMP eliminates the need for recurring payments. However, users might lack the support and ongoing updates associated with a subscription service.
- Affinity Photo offers a one-time purchase option, providing a more predictable cost structure compared to subscription-based alternatives. This can be attractive for users seeking long-term value without the ongoing commitment.
User Interface and Workflow Differences
The user interface and workflow significantly impact the editing experience. Different interfaces cater to various user needs and preferences.
- Adobe Picture Editor’s interface is well-organized, allowing for intuitive navigation and access to various tools. Its workflow, often integrated with other Adobe applications, streamlines the editing process for users accustomed to the Adobe ecosystem.
- GIMP, designed with a focus on flexibility, provides extensive customization options. However, its layout may be less intuitive for beginners. The workflow, while powerful, might require more time for users to become familiar with the tool.
- Affinity Photo’s interface is known for its user-friendliness and intuitive design. Its workflow is optimized for efficient editing, and its powerful features are easily accessible, making it a strong contender for ease of use.
Feature and Pricing Comparison Table
The following table summarizes the key features and pricing models of different photo editing software options.
| Software | Features | Pricing | User Interface |
|---|---|---|---|
| Adobe Picture Editor | Advanced editing tools, extensive filters, seamless integration with other Adobe products | Subscription-based, varying tiers with access to different features | Intuitive, well-organized, extensive customization |
| GIMP | Robust feature set, free and open-source | Free | Flexible, customizable, might require learning curve |
| Affinity Photo | Comprehensive set of features, one-time purchase | One-time purchase | User-friendly, intuitive design, optimized workflow |
Key Features and Tools
Adobe Photoshop and other similar image editors offer a rich suite of tools for image manipulation, enabling users to achieve a wide array of creative outcomes. These tools, ranging from basic adjustments to advanced techniques, cater to both novice and professional users. Understanding these tools and their applications empowers users to effectively manage images, enhancing their visual appeal and conveying intended messages.
The core functionalities of Adobe’s image editing software are built upon a foundation of precise tools. Mastering these tools allows users to perform tasks like color correction, retouching, and composition with confidence and precision. The software’s flexibility enables users to adapt to various projects and styles.
Essential Image Manipulation Tools
A robust collection of tools is fundamental to image manipulation. These tools cover a broad spectrum of functionalities, enabling users to modify, enhance, and create compelling visual narratives. This comprehensive set of tools includes tools for selection, editing, and manipulation of various aspects of the image.
Selection Tools
Precise selection is critical for targeted editing. The software offers a variety of selection tools, each designed for specific use cases. These tools enable users to isolate specific areas of an image for alteration without affecting adjacent regions. Tools like the lasso tool, marquee tool, and magic wand tool, each with varying degrees of precision, facilitate targeted editing.
- Lasso Tool: Allows for freehand selections, enabling complex shapes and intricate details to be selected, essential for intricate designs and precise editing.
- Marquee Tool: Provides rectangular, elliptical, single-row, and single-column selections, ideal for selecting areas with uniform shapes, simplifying tasks like cropping and resizing.
- Magic Wand Tool: Selects pixels based on color similarity, ideal for quickly selecting areas with uniform colors, useful for removing backgrounds or creating complex selections with a single click.
Editing and Adjustment Tools
Image editing extends beyond simple selection; adjustments to color, contrast, and other visual attributes are essential. The software offers tools that allow users to manipulate these attributes to refine images. These tools empower users to create precise and effective alterations to enhance image quality.
- Brush Tool: A versatile tool for painting, adding details, and retouching, offering various brush styles and sizes, allowing users to blend colors, correct imperfections, and add visual interest.
- Clone Stamp Tool: Allows for the replication of selected areas, ideal for seamlessly removing blemishes or inconsistencies, enabling realistic repairs to an image.
- Healing Brush Tool: Resembles the clone stamp tool, but more intelligently blends pixels, producing a more natural-looking repair, offering a more seamless retouching process.
Color Correction and Retouching Tools
Precise color correction and retouching are vital in image editing. The software’s tools offer nuanced control over color balance, contrast, and saturation. These tools enable users to adjust the visual aspects of the image, creating a desired aesthetic.
- Curves Tool: Enables precise adjustments to color channels, enabling users to fine-tune color balance, contrast, and saturation, offering highly customized color correction.
- Levels Tool: Allows adjustments to the tonal range of an image, adjusting the black and white points, allowing users to improve the overall tone and clarity of an image.
Composition Tools
Composition tools are crucial for creating visually engaging images. The software provides tools for adjusting image size, aspect ratio, and cropping. This ensures images are visually appealing and effectively convey the intended message.
- Crop Tool: Allows for adjusting the size and aspect ratio of an image, ensuring a balanced composition, offering users control over the visual focus of the image.
- Transform Tool: Enables various transformations like scaling, rotating, skewing, and shearing, offering users precise control over the image’s position and orientation.
User Interface and Workflow
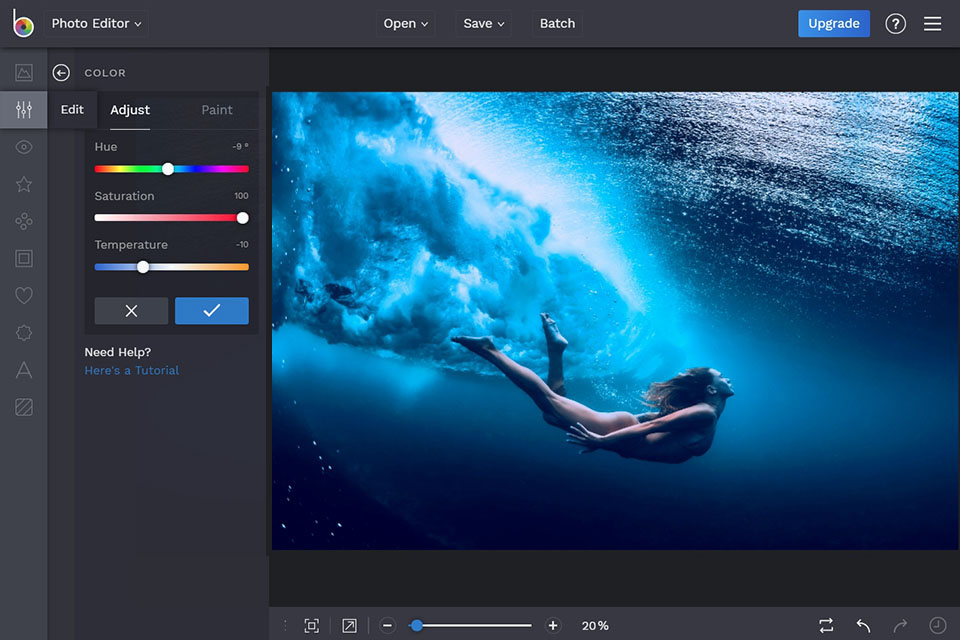
The Adobe Picture Editor boasts a user-friendly interface designed for intuitive navigation and efficient workflow. Its layout and organization are carefully considered to minimize learning curves and maximize productivity for both novice and expert users. This section details the software’s interface, common workflows, and the overall user experience.
Interface Layout and Organization
The software’s interface is primarily divided into panels and menus, offering a clear visual hierarchy. Key elements are strategically positioned for easy access and consistent use. The central workspace, often the largest area, displays the active image for editing. Surrounding this are panels for tools, adjustments, layers, and other essential functions. These panels can be customized to suit individual preferences, allowing users to arrange them for optimal workspace configuration.
Typical Workflows for Image Editing
Image editing tasks often follow a similar workflow within the software. A typical workflow begins with opening the image file, then proceeds with applying various edits like cropping, resizing, and color adjustments. Further refinement might involve applying filters, using layers for non-destructive editing, and finally exporting the modified image in the desired format.
Ease of Navigation and User Experience
The software’s intuitive design contributes significantly to its ease of navigation. Users can quickly find the tools and features they need, leading to a positive user experience. Clear labeling and well-organized menus contribute to the user-friendly nature of the software, making it easy to learn and use.
User-Friendliness of the Interface
The Adobe Picture Editor’s interface is designed with user-friendliness in mind. The intuitive layout, consistent tool placement, and clear visual cues minimize the learning curve, enabling users to quickly grasp the software’s functionalities. This translates to a smooth and efficient workflow, regardless of the user’s experience level.
Step-by-Step Guide for Common Editing Tasks
This section Artikels a step-by-step process for a common editing task: enhancing the contrast of an image.
- Open the Image: Locate the image file within the software’s file browser and click to open it in the central workspace. The image will be displayed within the workspace.
- Access Adjustments Panel: Look for the “Adjustments” panel, usually found within the menu bar or as a docked panel on the right side. Click on the panel to open it.
- Locate Contrast Adjustment: Within the “Adjustments” panel, locate the specific slider for “Contrast”. This usually involves navigating through different adjustment categories (e.g., “Basic”, “Color”, or “Advanced”).
- Adjust Contrast: Use the slider to increase the contrast of the image. Moving the slider to the right will increase the contrast, while moving it to the left will decrease it. Observe the changes in the image preview as you make adjustments. A subtle adjustment is often sufficient to achieve the desired effect.
- Save the Image: Once you’re satisfied with the contrast enhancement, save the edited image by clicking on the “Save” button. Select the desired file format and location for saving.
Detailed Description of Menus and Panels
The software’s menus and panels are organized logically, providing quick access to essential features. The File menu typically offers options for opening, saving, exporting, and managing files. The Edit menu allows for various editing operations, such as undo/redo, copy/paste, and transformations. The Image menu often houses options for resizing, cropping, and color adjustments. Panels, like the Layers panel, provide a visual representation of image layers for non-destructive editing. The Tools panel contains various editing tools for tasks such as selection, painting, and retouching. The Adjustments panel facilitates image enhancements like color correction, contrast adjustments, and exposure modifications. These menus and panels are designed to streamline the image editing process.
Integration with Other Adobe Products
Adobe’s Picture Editor seamlessly integrates with the broader Adobe Creative Cloud ecosystem, streamlining workflows and maximizing creative potential. This interconnectedness empowers users to leverage the strengths of various applications, enabling a more efficient and effective creative process. The ability to effortlessly exchange data between applications eliminates the need for time-consuming manual transfers, boosting productivity.
Integration Capabilities
The Picture Editor’s integration with other Adobe applications facilitates a fluid exchange of data and assets. This means users can import images, graphics, and other elements directly from applications like Photoshop, Illustrator, and InDesign, preserving their original quality and format. Similarly, users can easily export edited images in various formats compatible with other Adobe products.
Seamless Workflows
The seamless workflow capabilities of Adobe’s integrated applications create a highly productive environment for designers and editors. For instance, an artist might create a graphic in Illustrator, then import it into the Picture Editor for adjustments. The editing work can then be directly exported to InDesign, ensuring a consistent visual style across the entire project.
Advantages of Using Other Adobe Software
Using complementary Adobe applications alongside the Picture Editor expands creative options and facilitates a more comprehensive design process. For example, using Illustrator to create complex vector graphics, which can then be incorporated into a photo edit within the Picture Editor, offers a high level of precision and versatility. This approach empowers users to combine different creative styles and techniques for enhanced design results.
Compatible Adobe Products and Collaborative Functionalities
The Picture Editor’s compatibility extends to a range of Adobe Creative Cloud applications. This allows for a comprehensive range of functionalities to enhance design workflows. Below is a table outlining some key compatible products and their integration features.
| Adobe Product | Collaborative Functionality |
|---|---|
| Photoshop | Import and export PSD files; exchange image data for detailed edits and retouches; use of layered images |
| Illustrator | Import vector graphics for incorporation into photo edits; create custom shapes and elements to be integrated into images; utilize vector-based elements for precision |
| InDesign | Export images in various formats suitable for print and web; create layouts and incorporate edited images; ensure consistent design elements |
| Premiere Pro | Import and export images for video editing projects; use images as visual elements in video projects |
| After Effects | Import images for dynamic visual effects; apply special effects and animations to images for use in video or multimedia projects |
Examples of Importing and Exporting Images
The process of importing and exporting images between different Adobe applications is straightforward. For instance, to import a graphic created in Illustrator into the Picture Editor, simply open the Illustrator file, select the desired graphic, and then copy and paste it into the Picture Editor. Exporting is equally simple. After editing in the Picture Editor, choose the desired format (e.g., JPEG, PNG) and export the image to use in another Adobe application. This streamlined approach ensures that users can easily transition between applications and retain high-quality images.
Performance and System Requirements
Adobe Photoshop and other Adobe image editing software are known for their demanding resource requirements. Performance directly correlates with the capabilities of the hardware and the software version. This section details the expected performance on varying systems and the necessary specifications for optimal results.
Understanding the software’s performance characteristics across different systems is crucial for users to select appropriate hardware and ensure a smooth workflow. Different hardware configurations, including processor speed, RAM capacity, and graphics card capabilities, impact the editing experience significantly.
Hardware Requirements for Optimal Performance
Meeting minimum system requirements doesn’t guarantee optimal performance. Users should consider these specifications to avoid performance bottlenecks and ensure a fluid editing experience. Higher-end systems will enable faster loading times, smoother transitions between tools, and improved handling of complex tasks.
- Processor: A modern multi-core processor with a high clock speed is recommended. For instance, a 6th-generation Intel Core i5 or AMD Ryzen 5 processor, or higher, is suitable for general editing tasks. High-resolution image editing and complex layers require even more powerful processors.
- RAM: Sufficient RAM is critical for multitasking and handling large image files. A minimum of 16 GB is generally recommended for everyday use, but 32 GB or more is beneficial for working with multiple layers, high-resolution images, and complex editing tasks. This allows the software to maintain multiple image components in memory, ensuring smooth performance.
- Graphics Card: A dedicated graphics card is necessary for certain tasks, especially those involving image manipulation. For high-resolution photo editing, video editing, and other complex operations, a graphics card with sufficient processing power is recommended. A dedicated graphics card with at least 4 GB of VRAM is a common requirement.
- Storage: A fast and large storage device (SSD) is essential for quick loading times and file access. Large image files and project files require substantial storage space. The amount of storage required depends on the size of the project and the image resolution.
System Specifications for Smooth Operation
System specifications play a critical role in determining the overall experience. Different versions of the software may have varying performance demands, so users should check the specific requirements for their chosen version. The following guidelines are provided as a general reference.
- Operating System: The operating system influences performance. Modern versions of Windows and macOS are typically compatible with the latest Adobe software. Older operating systems might exhibit performance issues.
- File Handling: Adobe software handles large image files efficiently. The software employs techniques to manage the memory usage for these large files. Using appropriate techniques, such as batch processing or memory optimization, can enhance performance when handling massive image data.
- Version Comparison: Different software versions exhibit varying performance characteristics. New versions are generally optimized for newer hardware and offer improved performance, especially in handling high-resolution images and complex tasks. Previous versions might struggle with demanding tasks, particularly when compared to the latest versions.
Resource Consumption for Different Editing Tasks
The software’s resource consumption varies depending on the complexity of the editing task. Tasks involving multiple layers, filters, and adjustments require more resources than simple tasks.
- Simple Editing: Basic tasks, such as cropping and resizing, consume minimal resources. These tasks are relatively light on the system’s processing power and memory.
- Advanced Editing: Tasks involving numerous layers, complex filters, and adjustments demand substantial resources. High-resolution images with complex adjustments consume a significant amount of system resources.
- Batch Processing: Batch processing of multiple images consumes more resources than individual image editing. The software handles these tasks effectively, distributing processing across multiple cores.
Learning Resources and Tutorials
Mastering Adobe Picture Editor requires dedication and a structured learning approach. Comprehensive resources are available to guide users through the software’s intricacies, from basic functionalities to advanced techniques. This section Artikels valuable learning paths and tools to enhance your understanding and proficiency.
Learning Resources for Adobe Picture Editor
A plethora of resources is available to assist in learning Adobe Picture Editor. These range from official documentation to online tutorials and community forums. This diverse collection caters to various learning styles and experience levels.
Online Tutorials and Courses
Numerous online platforms offer structured tutorials and courses specifically designed for Adobe Picture Editor. These resources often provide step-by-step instructions, practical examples, and opportunities to apply learned concepts. Popular platforms like YouTube, Udemy, and LinkedIn Learning host a wide range of courses and tutorials. These courses frequently cover specific functionalities or techniques, allowing users to tailor their learning to particular needs. Some tutorials focus on basic image editing, while others dive into advanced techniques like photo retouching or graphic design.
Official Documentation and Help Resources
Adobe’s official website provides comprehensive documentation, including tutorials, help articles, and FAQs. The in-depth documentation serves as a valuable reference point for understanding the software’s features and functionalities. This detailed guide is accessible through the product’s website. Navigating the help system is straightforward, with search functionalities allowing users to locate specific topics quickly.
Community Forums and Support Groups
Active online communities, such as dedicated forums and support groups, offer valuable resources for troubleshooting, seeking guidance, and collaborating with other users. These communities provide a platform to connect with experienced users and share knowledge. These forums and support groups often feature discussions, questions, and solutions related to specific tasks or challenges. They offer an opportunity to interact with others and learn from their experiences.
Table Summarizing Learning Resources
| Resource | Format | Target Audience |
|---|---|---|
| Adobe’s Official Website | Documentation, tutorials, FAQs | All users, from beginners to advanced |
| Online Tutorials (YouTube, Udemy, etc.) | Video tutorials, step-by-step instructions | Users seeking specific techniques or functionalities |
| Community Forums | Discussion forums, Q&A sections | Users needing troubleshooting assistance or seeking expert advice |
Specific Use Cases
Adobe Picture Editor offers a versatile toolkit applicable across diverse creative domains. Its robust feature set empowers users to tackle intricate photo editing, graphic design projects, and web design tasks with precision and efficiency. From enhancing professional photography to crafting compelling visual content for websites, this software provides the tools needed to achieve exceptional results.
This section explores various use cases, demonstrating how different features contribute to successful outcomes in diverse creative fields. We’ll examine real-world applications and illustrate how specific effects are achieved using the software.
Professional Photography
The software’s advanced editing tools allow photographers to refine images with precision. Raw file support enables detailed control over image adjustments, from white balance and exposure to color grading and sharpening. Post-processing workflow is streamlined, enabling photographers to efficiently enhance images for professional presentations and publications. For example, correcting color casts, adjusting contrast, and sharpening details in landscape or portrait photography are easily achievable. Utilizing tools like the healing brush and spot removal tools can seamlessly address blemishes or imperfections, maintaining image integrity.
Graphic Design
Adobe Picture Editor provides powerful tools for graphic designers. The software’s ability to work with vector graphics and raster images allows for flexibility in creating diverse designs. The software facilitates the creation of logos, illustrations, and marketing materials. Tools like layers, masks, and blending modes provide precision control over visual elements. Creating complex designs, manipulating color palettes, and adding intricate details are effectively managed within the software. For instance, a graphic designer could create a vibrant infographic using various shapes, gradients, and typography styles.
Web Design
The software aids web designers in producing high-quality visuals for websites. Creating captivating visuals and optimizing images for the web are made simpler. The ability to resize and compress images without significant loss of quality allows for seamless integration into webpages. For instance, a web designer could create a compelling banner image for a website, ensuring optimal display on different devices and screen sizes.
Digital Illustration
Adobe Picture Editor empowers digital artists with a comprehensive set of tools. The program facilitates the creation and manipulation of intricate illustrations, from concept to final product. Users can seamlessly integrate various digital painting techniques to create original artwork. Creating detailed illustrations, manipulating colors, and adding unique effects are all readily achievable tasks. For example, an illustrator can create a detailed character design, incorporating diverse color palettes and textures to achieve a unique aesthetic.
Social Media Graphics
The software is instrumental in crafting engaging visuals for social media platforms. The software allows for creating eye-catching graphics tailored for different social media platforms. Features like cropping, resizing, and adding text overlays allow users to create optimized content for social media. For example, a social media manager can create visually appealing posts for Instagram or Facebook, attracting wider engagement.
Future Trends and Developments
The picture editing industry is constantly evolving, driven by advancements in technology and changing user needs. This evolution necessitates a proactive approach from software developers like Adobe, requiring a deep understanding of emerging trends and potential adaptations. Adobe’s Picture Editor must be prepared to integrate new technologies and features to maintain its position as a leading tool in the field.
Predicting the precise trajectory of future developments is challenging, but analyzing current trends provides a framework for potential future directions. This section explores key areas of development and how Adobe Picture Editor might adapt to these changes.
AI-Powered Enhancement and Automation
AI-powered tools are rapidly transforming various industries, and picture editing is no exception. Future picture editing software will likely incorporate more sophisticated AI-driven tools for tasks such as automatic image enhancement, style transfer, object removal, and background replacement. These tools can significantly streamline the editing process and make complex tasks more accessible to a broader range of users. For example, imagine a tool that automatically corrects lighting imbalances or removes unwanted elements in an image with a single click, freeing up the user to focus on artistic creativity.
Integration with Immersive Technologies
The rise of virtual reality (VR) and augmented reality (AR) is transforming how we interact with digital content. Future picture editing tools will likely integrate with these immersive technologies, allowing users to create and manipulate images within virtual environments. Imagine editing a photograph within a VR environment, allowing for a more intuitive and comprehensive manipulation of elements. This could lead to new creative possibilities in areas such as architectural visualization and product design.
Emphasis on Accessibility and Inclusivity
The importance of accessibility and inclusivity in software design is growing. Future picture editing software will need to accommodate users with diverse needs and abilities. This could involve intuitive interfaces for users with visual impairments, as well as support for a wider range of input devices and control methods. For instance, picture editing software could offer voice commands for controlling functions, simplifying tasks for users with limited dexterity.
Enhanced Collaboration and Sharing
As remote work and collaborative projects become more prevalent, picture editing software will need to support seamless collaboration. Future versions of Adobe Picture Editor might feature integrated cloud storage, real-time collaboration tools, and more sophisticated sharing mechanisms to facilitate teamwork among designers and artists. Consider real-time editing sessions where multiple users can collaborate on a single project simultaneously, with changes reflected instantly for all participants.
Advanced Image Formats and Standards
New image formats and standards will likely emerge to address the growing need for higher resolutions, dynamic range, and specialized functionalities. Adobe Picture Editor will need to adapt by supporting these emerging standards, allowing users to work with a broader range of file types and maintain compatibility across different platforms and devices. This adaptation is crucial to maintain compatibility with new formats like high-dynamic-range (HDR) images and other specialized formats.
Conclusive Thoughts
In conclusion, Adobe Picture Editor stands as a robust and versatile tool for image manipulation. Its diverse features, seamless integration with other Adobe applications, and user-friendly interface make it a popular choice for professionals and enthusiasts alike. We’ve explored its evolution, capabilities, and practical applications, offering a comprehensive understanding of this powerful software.


