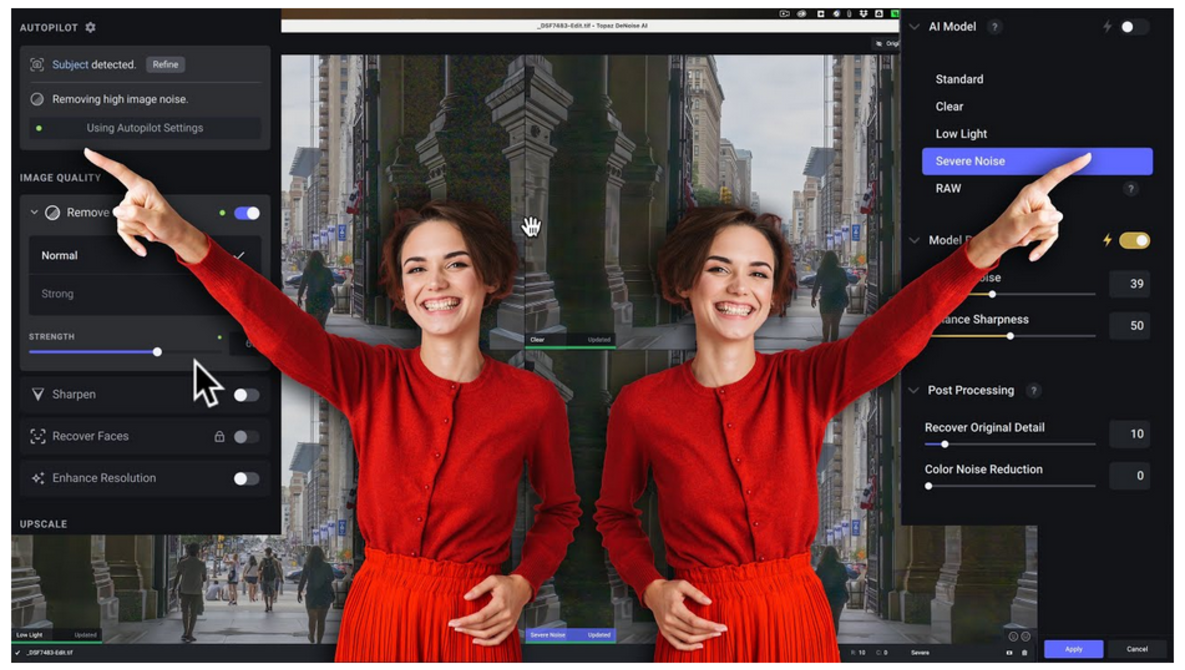
Denoising in Photoshop is a crucial skill for image editors, offering a way to refine and enhance digital images. This guide explores various techniques, from basic noise reduction to advanced methods, providing a comprehensive understanding of the process.
Images often suffer from unwanted noise, whether from camera sensors, scanning imperfections, or other sources. Understanding these sources and the appropriate tools for addressing them is key to achieving optimal results.
Introduction to Denoising in Photoshop
Image denoising is a crucial process in image editing that aims to reduce unwanted noise or graininess in digital images. Noise manifests as random variations in pixel intensity, appearing as speckles, blotches, or fuzzy textures. This unwanted element can significantly degrade image quality, hindering visual clarity and impacting the overall aesthetic appeal. Effective denoising techniques are essential for preserving image details and enhancing visual clarity.
Common types of noise in images arise from various sources. Sensor noise, often found in digital camera images, is caused by the sensor’s inherent limitations in capturing light. Electronic noise, which may occur in scanning or digitization processes, stems from imperfections in electronic circuits. Environmental factors like ambient light and motion blur also contribute to noise. Understanding the source of noise is critical for selecting the appropriate denoising technique.
Denoising plays a vital role in image processing. It is a crucial step in enhancing the quality of images that have been degraded by noise. High-quality images are often necessary for scientific analysis, medical imaging, and forensic investigations. By reducing noise, the accuracy and clarity of images are improved, facilitating better interpretation and analysis. The enhanced visual clarity obtained through denoising can also be valuable for artistic purposes.
Photoshop offers several tools and techniques for effectively removing noise from images. These techniques vary depending on the type and severity of noise present. A thorough understanding of these techniques and their respective strengths and weaknesses enables users to achieve optimal denoising results.
Denoising Techniques in Photoshop
Different noise types stem from distinct origins, requiring tailored approaches to removal. A systematic approach is crucial for achieving effective results. The following table Artikels various noise types, their common sources, the corresponding Photoshop tools, and the methods employed for removal.
| Noise Type | Source | Photoshop Tool | Method Description |
|---|---|---|---|
| Salt-and-pepper noise | Sensor imperfections, compression artifacts | Noise Reduction | This tool employs a median filter, replacing each pixel with the median value of its neighboring pixels. This method is effective for removing isolated bright or dark pixels. |
| Gaussian noise | Electronic noise, sensor noise | Noise Reduction | Utilizes a Gaussian filter to smooth the image by averaging pixel values within a defined area. The filter weights the contributions of neighboring pixels according to a Gaussian distribution, preserving details while reducing noise. |
| Speckle noise | Sensor noise, digital compression | Unsharp Mask | This tool can be used to enhance details and reduce speckle noise. The method involves sharpening the image, which effectively isolates the speckle noise and attenuates it. |
| Motion blur | Camera movement during exposure | Gaussian Blur | This tool is used to soften the image and reduce motion blur. By blurring the image, the effect of motion is lessened, and the image appears smoother. |
Photoshop Tools for Denoising
Photoshop offers a suite of tools to combat image noise, ranging from simple to sophisticated. Understanding their individual strengths and weaknesses is crucial for selecting the appropriate tool for a given image and noise type. This section delves into the key Photoshop tools for denoising, outlining their functionalities and practical applications.
Key Photoshop Denoising Tools
Various Photoshop tools address different noise characteristics and image types. The selection process often depends on the nature of the noise and the desired outcome.
- Noise Reduction Filter: This filter is a fundamental tool for removing noise. It employs a process of averaging pixel values in the affected area, effectively smoothing out the image. It’s generally suitable for reducing Gaussian noise, a common type of noise arising from sensor imperfections in cameras. Using this tool involves selecting the desired noise reduction level, ensuring it doesn’t excessively blur fine details. For example, a high noise reduction setting might be appropriate for a grainy image, while a lower setting is ideal for a photograph with subtle noise.
- Unsharp Mask: While primarily known for sharpening, the Unsharp Mask can be used to reduce noise in some cases, especially when the noise appears as small, sharp artifacts. The tool works by increasing contrast, which can diminish the visual impact of noise, though it may not be as effective for more widespread or complex noise patterns. Applying this tool to a noisy image involves adjustments to the Radius and Amount parameters to achieve a balance between noise reduction and detail preservation. This tool is often effective for reducing salt-and-pepper noise, characterized by isolated bright and dark pixels.
- Median Filter: The Median Filter is particularly effective at reducing impulsive noise, such as salt-and-pepper noise, which appears as isolated pixels of extreme brightness or darkness. It operates by replacing each pixel with the median value of its surrounding pixels. This process effectively suppresses isolated extreme values, thus reducing the impact of impulsive noise. For example, if a region has a bright pixel surrounded by darker pixels, the Median Filter will likely replace the bright pixel with a darker value, thereby reducing the prominence of the outlier.
- Gaussian Blur: While primarily a blurring tool, the Gaussian Blur can also reduce noise, especially Gaussian noise. It works by averaging pixel values in a Gaussian distribution, effectively smoothing out the image. The Gaussian distribution ensures that the effect is more gradual compared to a simple average, preserving more image details than a simple averaging filter. Its effectiveness in denoising depends on the selection of the Radius value; a larger Radius results in more noise reduction but also more blurring.
Comparative Performance of Denoising Tools
Different tools perform better for different types of noise. This table provides a general guideline for choosing the appropriate tool.
| Tool Name | Description | Use Cases | Strengths/Weaknesses |
|---|---|---|---|
| Noise Reduction Filter | Averages pixel values. | Gaussian noise, overall noise reduction. | Effective for Gaussian noise, but can blur fine details with high settings. |
| Unsharp Mask | Increases contrast. | Salt-and-pepper noise, sharp noise artifacts. | Good for isolated noise, may not be as effective for pervasive noise. |
| Median Filter | Replaces pixel with median value. | Salt-and-pepper noise, impulsive noise. | Excellent for salt-and-pepper noise, can lose sharp details. |
| Gaussian Blur | Averages pixel values in a Gaussian distribution. | Gaussian noise, reducing overall noise levels. | Effective for Gaussian noise, can cause significant blurring with high Radius values. |
Advanced Denoising Techniques
Beyond basic denoising tools, Photoshop offers advanced techniques capable of handling complex noise patterns and preserving image details more effectively. These methods often involve sophisticated algorithms and adjustments to achieve optimal results, potentially requiring a more in-depth understanding of image processing principles.
Advanced denoising techniques in Photoshop typically leverage sophisticated algorithms to analyze the image’s pixel data in greater detail. This analysis allows them to identify and selectively reduce noise while preserving subtle details and textures within the image. These techniques frequently involve multiple steps or parameters that users can adjust to fine-tune the denoising process to their specific needs.
Non-linear Filtering
Non-linear filtering methods are particularly useful for reducing noise while preserving sharp edges and textures. These methods analyze pixel values in a non-linear fashion, which means that the effect of a pixel on its neighbours is not simply a linear combination of their values. This allows for more nuanced noise reduction, preventing blurring of sharp details that can occur with linear methods.
Non-linear filtering techniques, such as the median filter, work by replacing a pixel’s value with the median value of its surrounding pixels. This approach is effective in removing outliers (noises) without significantly altering the overall image structure. The advantage is a higher chance of preserving important details. However, it can sometimes lead to a slightly softened appearance, especially in areas with high detail.
| Step | Description |
|---|---|
| 1 | Identify the pixel to be processed. |
| 2 | Gather the surrounding pixels within a defined neighbourhood. |
| 3 | Sort the pixel values within the neighbourhood in ascending order. |
| 4 | Replace the original pixel value with the median value from the sorted list. |
Adaptive Filtering
Adaptive filtering techniques consider the local characteristics of the image to adjust the denoising process. This means that different parts of the image receive different levels of noise reduction based on their specific features. For example, areas with higher noise might receive stronger filtering, while areas with fewer noise might have less intensive processing.
The effectiveness of adaptive filtering stems from its ability to tailor the noise reduction to the image’s local characteristics. The downside is that the processing time might be slightly longer than simpler methods. A user needs to fine-tune the parameters to balance detail preservation and noise reduction.
| Step | Description |
|---|---|
| 1 | Divide the image into smaller regions or tiles. |
| 2 | Analyze the noise level within each tile. |
| 3 | Apply different filtering parameters to each tile based on its noise level. |
| 4 | Combine the results from each tile to form the final denoised image. |
Guided Filtering
Guided filtering is a technique that leverages a “guidance” image to control the denoising process. The guidance image is typically a low-noise version of the original image or a similar image that has been processed using other denoising techniques. The guided filter uses this reference to preserve details and textures while reducing noise.
Guided filtering’s strength lies in its ability to preserve fine details while effectively reducing noise. However, it is sensitive to the quality of the guidance image. A poor guidance image can lead to undesired artifacts in the output.
| Step | Description |
|---|---|
| 1 | Select a guidance image (e.g., a low-noise version of the original image). |
| 2 | Apply a guided filter to the noisy image, using the guidance image as a reference. |
| 3 | Adjust the filter parameters to control the strength of the denoising effect. |
Practical Examples of Denoising
Denoising in Photoshop is a vital tool for enhancing image quality, particularly in scenarios where unwanted noise degrades the visual appeal and clarity of the captured data. This section will delve into practical applications, demonstrating how to effectively use various denoising techniques on diverse image types and noise characteristics.
Applying denoising techniques to images requires understanding the type of noise present and selecting the appropriate method. Different noise types necessitate different approaches, and a careful analysis of the “before” and “after” results is crucial for assessing the effectiveness of the chosen method.
Scenario: Capturing Astronomical Images
Capturing images of celestial objects often involves extended exposures to gather sufficient light. However, this prolonged exposure can introduce significant noise, obscuring the subtle details of the celestial bodies. Denoising is critical in this context to recover the faint features and preserve the integrity of the data. For example, in astrophotography, a long-exposure image of a nebula may appear hazy and grainy due to the presence of thermal noise and read noise. Proper denoising techniques can significantly improve the image quality, revealing the delicate structures and colors of the nebula.
Applying Denoising to a Sample Image
Consider an image of a nebula, captured with a long exposure, exhibiting significant noise. Applying the “Noise Reduction” filter in Photoshop can be effective. Adjusting the “Amount” slider in the filter controls the degree of denoising. Over-denoisng can result in a loss of detail. The process requires a careful balance between reducing noise and preserving essential image details.
Before and After Results
A before-and-after comparison illustrates the impact of denoising. The initial image, before denoising, shows a speckled, grainy texture. After denoising, the image’s noise is substantially reduced, revealing smoother tones and sharper details of the nebula. This improvement allows for a more accurate representation of the celestial object’s features.
Various Image Types and Noise Types
Different types of images exhibit different types of noise. Images from digital cameras may suffer from salt-and-pepper noise, while those captured with long exposures may exhibit Gaussian noise. Understanding these characteristics is crucial for choosing the appropriate denoising method. For example, salt-and-pepper noise is characterized by isolated bright or dark pixels, which can be effectively removed using a median filter. Gaussian noise, a more pervasive type of noise, can be mitigated by using a Gaussian blur filter in conjunction with other denoising methods.
Table: Image Type, Noise Type, Method Used, and Result Analysis
| Image Type | Noise Type | Method Used | Result Analysis |
|---|---|---|---|
| Astronomical Image (Nebula) | Gaussian Noise | Noise Reduction Filter (Photoshop) | Significant reduction in noise, revealing subtle details of the nebula. |
| Digital Camera Photo (Low Light) | Salt-and-Pepper Noise | Median Filter | Effective removal of isolated bright and dark pixels, resulting in a cleaner image. |
| Medical Scan (X-Ray) | Gaussian Noise | Adaptive Median Filter | Preserves sharp edges while reducing noise, vital for accurate analysis. |
| Satellite Image (Landsat) | Gaussian Noise | Bilateral Filter | Excellent preservation of sharp edges and fine details while minimizing blurring, important for analysis of land features. |
Considerations for Denoising
Choosing the right denoising technique in Photoshop is crucial for achieving optimal results. Factors like the type of noise, the desired level of detail preservation, and the specific image characteristics all play a role in selecting the appropriate method. Understanding these factors allows for targeted denoising, minimizing artifacts and maximizing the quality of the final image.
Effective denoising requires careful consideration of potential pitfalls, such as over-processing and the introduction of unwanted artifacts. By understanding the interplay between denoising parameters and image characteristics, you can avoid these issues and maintain the integrity of the image. A strategic approach, combining knowledge of the image and the denoising technique, leads to superior outcomes.
Factors Influencing Denoising Method Choice
Different denoising techniques cater to various image characteristics. The type of noise present (e.g., Gaussian, salt-and-pepper) and the image’s content (e.g., portraits, landscapes) influence the selection of a suitable denoising method. For instance, Gaussian noise may benefit from a median filter, while salt-and-pepper noise might respond better to a bilateral filter. The complexity of the image content also plays a significant role; intricate details require techniques that prioritize detail preservation.
Avoiding Over-Denoising and Artifacts
Over-denoising can lead to a loss of important image details, resulting in a blurry or unnatural appearance. Artifacts, such as halos or smudges, can also emerge as a consequence of aggressive denoising. A key to effective denoising is understanding the balance between noise reduction and detail retention. Begin with a lower intensity setting and gradually increase it, evaluating the effect on the image.
Preserving Image Details During Denoising
Preserving image details during denoising is crucial for maintaining the image’s aesthetic appeal. High-frequency details, such as fine textures and edges, are often vulnerable to being removed during denoising. Using a technique that selectively targets noise without impacting these details is essential. Consider employing adaptive filtering methods, which adjust the denoising intensity based on the local image content.
Importance of Image Quality and File Size
The quality of the original image and the desired file size have a direct impact on the denoising process. A high-resolution image with a large file size can handle more aggressive denoising without significant loss of quality. Conversely, a low-resolution image with a small file size may require a more delicate approach to avoid over-processing and artifacts. Careful consideration of these factors ensures the final image meets the required standards.
Image Denoising Considerations Table
| Image Type | Noise Level | Desired Result | Recommended Denoising Method |
|---|---|---|---|
| High-resolution portrait | Moderate | Sharp details, minimal noise | Adaptive Gaussian filter |
| Low-resolution landscape photograph | High | Reduced noise, preservation of general details | Median filter |
| Scanned document | Salt-and-pepper | Clean text, reduced speckles | Bilateral filter |
| High-resolution photograph with strong noise | Very high | Significant noise reduction, preservation of fine details | Non-linear filtering, e.g., wavelet denoising |
Denoising in Specific Image Types
Denoising techniques are not a one-size-fits-all solution. The optimal approach depends significantly on the characteristics of the image being processed. Understanding the source of noise and the desired outcome is crucial for achieving the best results. Different image types exhibit varying noise patterns, requiring tailored denoising strategies.
Choosing the appropriate denoising method hinges on factors like the image’s resolution, the type and intensity of noise, and the preservation of important details. For instance, a scanned image might benefit from a different approach than a low-light photograph, even though both could be considered noisy. This section explores denoising strategies for specific image types, demonstrating how to select the right technique and achieve optimal results.
Scanned Images
Scanned images often suffer from noise originating from imperfections in the scanning process or the original document. This noise is frequently granular or speckled, affecting the overall image clarity. Median filtering is often a good starting point for scanned images. This technique effectively reduces the impact of isolated noisy pixels by replacing them with the median value of their surrounding neighbors. Adaptive filtering, which adjusts its strength based on local noise characteristics, is also well-suited. Combining median filtering with a subsequent Gaussian blur can further smooth the image while retaining essential details.
Low-Light Photos
Low-light photography frequently exhibits high levels of noise due to the sensor’s limited light intake. This noise often appears as graininess or speckles, making the image appear grainy. For low-light images, non-local means denoising (NLM) is frequently employed. NLM effectively utilizes the statistical properties of image neighborhoods to reduce noise while preserving edges and details. This technique considers the local context of each pixel, making it particularly suitable for preserving subtle details in low-light environments. It also performs well in high-resolution images.
High-Resolution Images
High-resolution images often contain significant amounts of noise, making denoising crucial for improving image quality. The noise in high-resolution images can manifest in several ways, affecting the image’s overall clarity. While many denoising methods work on high-resolution images, the use of sophisticated techniques, such as NLM or wavelet-based denoising, can be very beneficial. These methods often focus on preserving sharp edges and fine details, which can be lost in simple averaging approaches.
Image Types and Appropriate Denoising Techniques
- Scanned Documents: Median filtering, adaptive filtering, Gaussian blur
- Low-Light Photos: Non-local means denoising (NLM), wavelet-based denoising
- High-Resolution Images: Non-local means denoising (NLM), wavelet-based denoising, guided filtering
- Images with Salt-and-Pepper Noise: Median filtering, bilateral filtering
The selection of the most suitable technique often depends on the characteristics of the image and the specific noise patterns present. Carefully analyzing the image and its noise properties is crucial for making an informed decision.
Comparison of Denoising Techniques
| Image Type | Denoising Technique | Strengths | Weaknesses |
|---|---|---|---|
| Scanned Images | Median Filtering | Effective at reducing isolated noise | Can blur edges, not effective for complex noise patterns |
| Low-Light Photos | Non-Local Means (NLM) | Preserves details, effective for high noise levels | Computationally intensive |
| High-Resolution Images | Wavelet-based Denoising | Excellent at preserving fine details, effective for different noise types | Requires more computational power than other methods |
| Images with Salt-and-Pepper Noise | Bilateral Filtering | Effective at reducing salt-and-pepper noise without blurring edges | Can be slower than median filtering for large images |
This table provides a general overview. The optimal choice may vary based on the specific image characteristics.
Workflow and Best Practices
Image denoising in Photoshop requires a systematic approach to achieve optimal results while preserving image quality. Understanding the workflow and best practices ensures that the process is efficient and yields the desired outcome. Proper preparation and meticulous execution are key to successful denoising.
Preparing the Image for Denoising
Thorough image preparation is crucial for a successful denoising process. This involves understanding the image’s characteristics and applying suitable pre-processing techniques. Identifying the type of noise present, the image format, and its overall quality will help in determining the best denoising method.
- Assess the Noise Type: Analyze the image for the type of noise present (e.g., Gaussian, salt-and-pepper, speckle). Different types of noise require specific denoising techniques.
- Adjust Image Format: Ensure the image is in a format suitable for denoising. Converting to a lossless format like TIFF or PSD can be beneficial for preserving detail.
- Evaluate Image Quality: Assess the image’s resolution and dynamic range. High-resolution images might benefit from downsampling before denoising to improve processing time. The dynamic range of the image impacts the denoising process, so it should be considered.
- Identify Image Characteristics: Examine the image’s color palette and subject matter. Understanding the content helps to avoid unwanted artifacts during the denoising process.
Optimizing the Denoising Process
Efficient denoising involves utilizing Photoshop’s features effectively. Choosing appropriate settings and employing strategic techniques can significantly impact the outcome. Understanding the capabilities of the denoising tools available in Photoshop is critical.
- Select the Appropriate Tool: Choose the denoising tool best suited for the image’s characteristics and noise type. The “Noise Reduction” filter is often a good starting point. The specific tool may vary depending on the noise type and the desired outcome.
- Experiment with Settings: Adjust the settings of the denoising tool carefully. Adjusting parameters like noise reduction strength and details preservation allows for fine-tuning. Experimentation with different settings is necessary to achieve the best result for the image.
- Iterative Refinement: Apply the denoising tool in iterations. Evaluate the results after each iteration and make necessary adjustments to the settings. This iterative approach ensures that the denoising process is tailored to the specific image’s characteristics.
- Monitor Image Quality: Continuously monitor the image quality throughout the denoising process. Pay close attention to the details and overall visual impact. Maintaining visual fidelity is paramount in the denoising process.
Maintaining Original Image Quality
Preserving the original image’s quality during the denoising process is essential. Using appropriate techniques and settings minimizes the loss of detail and clarity.
- Preserve Detail: Aim to minimize the loss of detail while reducing noise. Appropriate settings can balance noise reduction with detail preservation.
- Avoid Excessive Smoothing: Excessive smoothing can lead to a loss of image sharpness and detail. Adjust settings cautiously to maintain the original image’s texture and sharpness.
- Use Preview and Adjustments: Use Photoshop’s preview features to monitor changes in real-time. Making adjustments during the process allows for immediate feedback and control.
- Employ Non-Destructive Editing: Use Photoshop’s non-destructive editing features. This allows for easy reversal of steps and experimentation with different settings without permanently altering the original image.
Denoising Image Workflow
A structured workflow streamlines the denoising process and ensures optimal results.
- Image Assessment: Analyze the image for noise type and characteristics.
- Preprocessing: Adjust the image format, resolution, and dynamic range.
- Tool Selection: Choose the appropriate denoising tool based on the noise type.
- Settings Adjustment: Experiment with settings for noise reduction and detail preservation.
- Iterative Application: Apply the tool in iterations and evaluate results.
- Quality Monitoring: Continuously monitor the image’s quality throughout the process.
- Non-Destructive Editing: Utilize non-destructive editing for flexibility.
- Final Review: Carefully review the denoised image for any artifacts or undesirable changes.
Wrap-Up
This comprehensive guide has covered the essential aspects of denoising in Photoshop. By understanding the different tools and techniques, and considering the specific needs of each image, users can achieve superior results. Mastering these methods is essential for professional-quality image editing.


