Dive into the world of image editing with Photoshop Essentials! This comprehensive guide will equip you with the fundamental tools and techniques to transform your images. From basic adjustments to advanced manipulations, we’ll explore the core concepts that power professional-level editing.
This resource covers everything from opening and saving images to creating stunning special effects and advanced techniques like 3D modeling integration. Mastering these Photoshop essentials unlocks a world of creative possibilities, whether you’re a beginner or an experienced editor looking to refine your skills.
Introduction to Photoshop Essentials
Photoshop essentials encompass the fundamental tools and techniques necessary for effective image manipulation and editing. These core elements form the foundation upon which more advanced techniques are built, enabling users to transform images from basic enhancements to complex artistic creations. Mastering these essentials unlocks a world of creative possibilities, from simple color adjustments to intricate photo retouching.
Core Concepts and Tools
Photoshop’s power stems from its wide array of tools, each designed for specific tasks. Understanding these tools and their functionalities is crucial for efficient image editing. Key concepts include layers, selections, adjustments, and filters. Layers allow for non-destructive editing, meaning changes to one layer do not affect others. Selections enable targeted editing of specific image areas. Adjustments offer a broad range of options for modifying colors, brightness, and contrast. Filters provide artistic effects and transformations.
Fundamental Tools Overview
A grasp of Photoshop’s essential tools empowers users to perform basic image editing tasks efficiently. This section Artikels several crucial tools, providing concise descriptions and visual representations.
| Tool Name | Brief Description | Icon/Image Representation |
|---|---|---|
| Move Tool | Used for moving, resizing, and transforming objects or selections within an image. | (Imagine a simple hand cursor icon.) |
| Crop Tool | Allows users to precisely define and isolate a portion of an image, removing unwanted parts. | (Visualize a rectangular selection tool with a visible border.) |
| Marquee Tool | Used to create rectangular, elliptical, or single-row/column selections within an image. | (Imagine different shapes like rectangles, ellipses, or single rows/columns as the tool selection.) |
| Brush Tool | Allows for painting or applying effects to specific areas within an image using different brush shapes and sizes. | (Imagine a paintbrush with varying bristle patterns and sizes, with different colors.) |
| Eraser Tool | Removes portions of an image by erasing pixels. | (Visualize a rubber eraser tool, potentially with varying eraser sizes and shapes.) |
| Magic Wand Tool | Selects similar colors or pixels in an image based on the tolerance setting. | (Imagine a wand-like tool, with different sizes and colors.) |
Photoshop’s History and Impact
Photoshop’s evolution has profoundly impacted image editing and visual communication. Initially developed in the 1980s, it quickly gained popularity for its ability to manipulate and enhance images. Its early versions focused on basic image adjustments, but subsequent versions introduced advanced features like layers, channels, and filters. Today, Photoshop remains the industry standard for professional image editing, influencing countless creative endeavors. Its availability on various platforms (desktop, mobile) and continued updates have broadened its accessibility and application.
Basic Image Editing Techniques
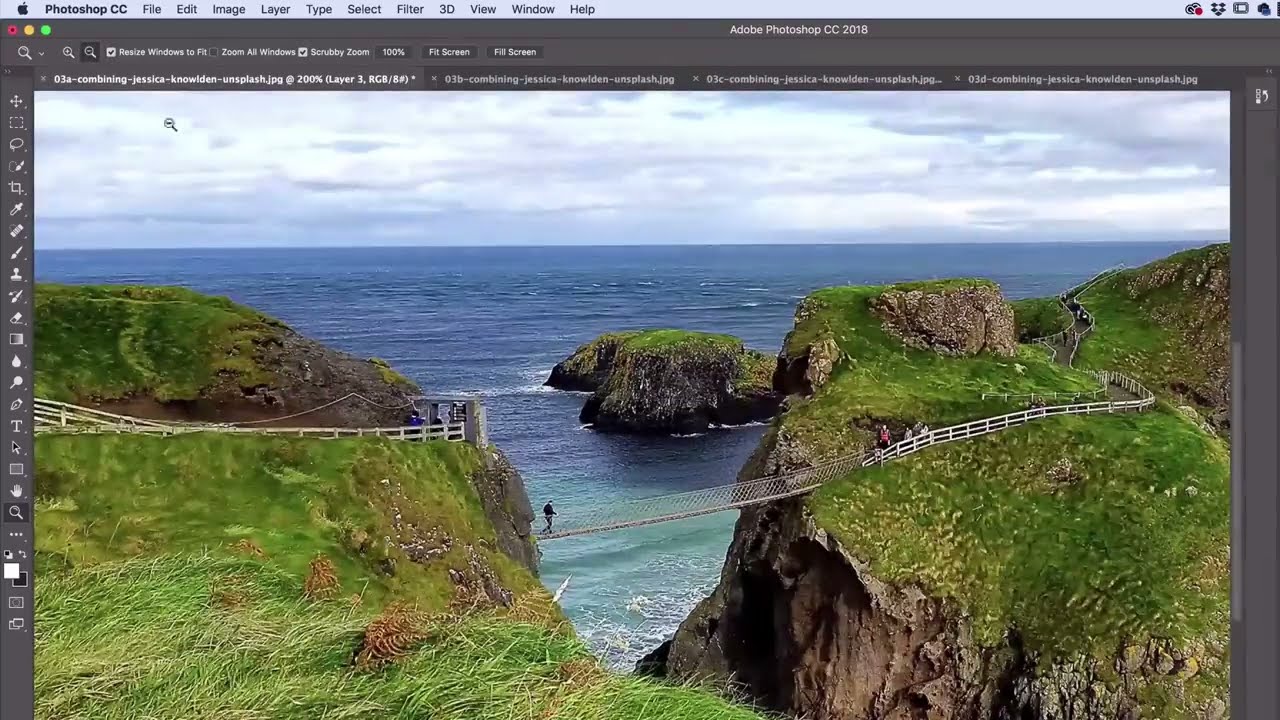
Image editing is a crucial skill in many fields, from graphic design to photography. Mastering fundamental techniques allows for significant improvements in image quality and presentation. This section explores essential image editing steps using Adobe Photoshop.
Image editing in Photoshop empowers users to manipulate images in various ways, from simple adjustments to complex transformations. Understanding these techniques is vital for enhancing visual appeal and conveying intended messages effectively.
Opening, Saving, and Resizing Images
Opening existing images in Photoshop is straightforward. Select “File” > “Open” and navigate to the desired image file. Photoshop supports a variety of image formats. Saving images involves choosing a format, typically JPEG or PNG, and adjusting quality settings as needed. Resizing an image involves altering its dimensions, impacting resolution and file size. Using the Image > Image Size command allows for precise control over width, height, and resolution.
Cropping, Rotating, and Flipping Images
Cropping an image removes unwanted portions, focusing attention on the desired subject. Photoshop’s cropping tool allows for precise selection of the area to retain, enabling a streamlined workflow. Rotating images adjusts their orientation. This is often necessary for aligning images with the intended composition. Flipping an image reverses its horizontal or vertical axis, providing a mirror effect or reversing the image’s content.
Adjusting Brightness, Contrast, and Color Balance
Adjusting brightness, contrast, and color balance are fundamental techniques for enhancing image quality. Brightness controls the overall lightness or darkness of an image. Contrast emphasizes the difference between light and dark areas. Color balance corrects imbalances in the image’s color palette. Using the Levels or Curves tools provides advanced control over these adjustments, allowing for precise fine-tuning.
Removing Unwanted Objects or Blemishes
Removing unwanted objects or blemishes from images can be achieved through various techniques. The Clone Stamp tool allows for the replication of pixels from one part of the image to another, effectively concealing imperfections. The Healing Brush tool automatically matches the color and texture of surrounding pixels, blending the removal seamlessly. Using the Content-Aware Fill feature, Photoshop intelligently fills in removed areas, maintaining the overall image integrity.
Image File Formats Comparison
| File Format | Advantages | Disadvantages |
|---|---|---|
| JPEG | Small file size, widely compatible, good for web use. | Lossy compression, quality degradation with repeated edits. |
| PNG | Lossless compression, good for images with sharp lines and text, transparent backgrounds supported. | Larger file size compared to JPEG, not as widely supported as JPEG. |
| TIFF | Lossless compression, high quality, suitable for professional printing, edits do not degrade quality. | Very large file size, not ideal for web use. |
Different file formats cater to various needs. JPEG is preferred for web images due to its small size, while PNG is suitable for graphics with sharp details. TIFF is chosen for professional printing due to its high quality and lossless compression.
Working with Layers
Layers are the fundamental building blocks of non-destructive editing in Photoshop. They allow you to isolate and manipulate different elements of an image without affecting other parts. This modular approach is crucial, enabling you to easily modify, adjust, or completely replace elements without permanently altering the original image data. Imagine building a complex image like a layered cake – each layer represents a distinct component, and you can modify each component without disturbing the others.
The concept of layers extends beyond simply stacking images; it empowers you with precise control over every aspect of your work. This control is pivotal, enabling advanced editing techniques and complex compositions that would be nearly impossible with traditional, destructive editing methods. This modular structure also facilitates efficient workflow, especially when dealing with intricate projects.
Understanding Layer Functionality
Layers are essentially transparent sheets that contain individual elements of your image. This separation of elements is crucial for non-destructive editing, enabling independent adjustments without affecting other parts of the image. Each layer can have its own properties, like blending modes, opacity, and fill, offering extensive customization options.
Layer Styles
Different layer styles allow you to apply special effects to layers without altering the underlying pixel data. These styles can significantly enhance the visual appeal of your image, from subtle adjustments to dramatic transformations. Common styles include blending modes, opacity, and fill.
Blending Modes
Blending modes control how the pixels of one layer interact with the pixels of the layers beneath. Different blending modes produce a wide variety of visual effects, ranging from subtle overlays to dramatic changes in contrast and color.
- Normal: This is the default blending mode, where the layer’s pixels are simply overlaid on the layers below.
- Multiply: Darkens the underlying layer, creating a more dramatic effect.
- Screen: Lightens the underlying layer, producing a brighter image.
- Overlay: Combines the effects of Multiply and Screen, darkening or lightening the underlying layer depending on the tone of the layer being applied.
| Blending Mode | Visual Effect |
|---|---|
| Normal | Simple overlay; no change in tone or color |
| Multiply | Darkens the underlying layer; useful for creating shadows or darkening certain areas |
| Screen | Lightens the underlying layer; useful for adding highlights or brightening areas |
| Overlay | Darkens or lightens the underlying layer depending on the tone; creates a more complex effect than Multiply or Screen |
| Soft Light | A softer version of Overlay, producing less dramatic changes |
| Hard Light | A more dramatic version of Overlay, producing more noticeable changes |
Creating and Manipulating Layer Types
Photoshop offers various layer types, each serving a specific purpose. Understanding these different types is crucial for creating and manipulating complex images. A key example is adjustment layers, which allow you to adjust aspects of the image without directly altering the original pixel data.
- Adjustment Layers: These layers apply adjustments (like levels, curves, or color balance) to the image without permanently altering the original image data. They act as filters, enabling you to fine-tune the image’s overall look and feel without affecting the underlying layers.
- Shape Layers: These layers enable you to create vector shapes directly in the image, offering flexibility in resizing and editing. These layers are particularly useful for creating logos, illustrations, or graphic elements.
- Text Layers: Used to add text to your image. You can modify the font, size, style, color, and other attributes of the text within these layers.
Grouping and Organizing Layers
Organizing your layers effectively is vital for complex projects. Grouping related layers simplifies management and enables you to easily move, transform, or apply effects to a set of elements simultaneously. This method reduces the complexity of large projects.
- Layer Groups: Layer groups allow you to organize and nest layers, enabling you to treat sets of layers as a single entity. This is especially helpful when dealing with complex compositions.
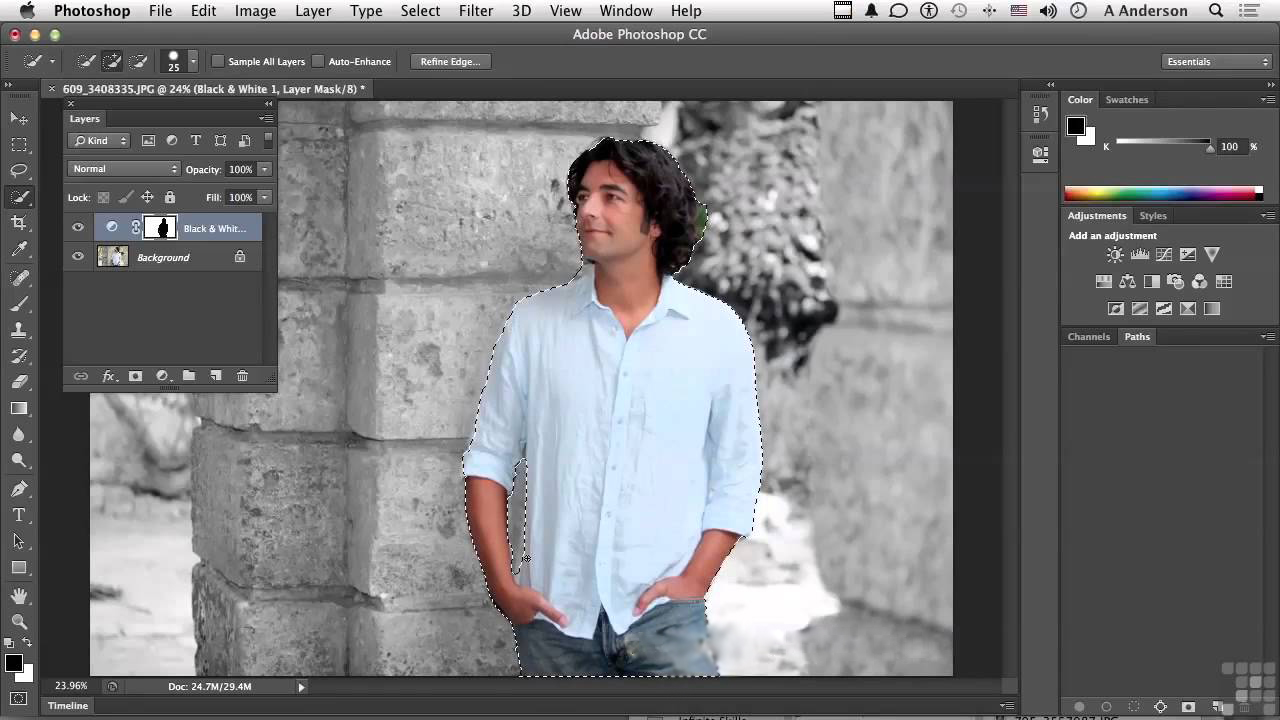
Selection Tools and Masking
Mastering selection tools and masking techniques is crucial in Photoshop for isolating and manipulating specific parts of an image. These tools enable precise editing, intricate compositing, and a wide range of creative effects. Understanding how to use them effectively is a cornerstone of proficient image manipulation.
Photoshop’s Selection Tools
Photoshop provides a suite of selection tools, each with its own strengths and applications. These tools allow for the precise isolation of image components, enabling precise edits, masks, and composites. The choice of tool depends on the complexity and nature of the selection needed.
Different selection tools excel in various scenarios. The marquee tools are ideal for simple shapes, while the lasso tools provide more flexibility for freeform selections. The pen tool is best for complex, intricate shapes and precise selections.
- Marquee Tools: These tools are best suited for creating rectangular, elliptical, single-row, or single-column selections. Their simplicity makes them ideal for basic selections, like cropping or isolating rectangular portions of an image. These tools provide a quick and efficient method for making basic shapes.
- Lasso Tools: The lasso tools offer greater flexibility for freehand selections. The Polygonal Lasso tool is useful for creating selections with straight lines, while the Magnetic Lasso tool automatically follows edges in the image. These tools are advantageous when dealing with irregular shapes or when a freeform selection is required.
- Pen Tool: The Pen tool is a powerful tool for creating highly precise selections. It allows for the creation of complex paths and selections with perfect accuracy. This tool is particularly useful for creating intricate shapes, complex selections, and vector-based edits. The tool’s path-based nature allows for non-destructive editing and scalable outputs.
Creating Precise Selections and Masks
To create accurate selections, one needs to understand the different methods for refining selections and correcting imperfections. Techniques for achieving this precision include adjusting the selection’s feathering, using the selection’s adjustment brush, and using the Refine Edge feature.
- Feathering: Feathering softens the edges of a selection, blurring the transition between the selected area and the surrounding pixels. This technique is beneficial for creating smooth edges, especially when dealing with intricate or irregular shapes.
- Selection Adjustment Brush: This tool allows for precise modifications to the selection’s boundaries. It provides a more precise and controlled way to add or subtract from a selection.
- Refine Edge Tool: This tool provides an advanced option for refining selection edges, especially useful for complex or challenging selections. The Refine Edge tool allows precise control over the selection’s boundaries, enabling accurate isolation of subjects.
Refining Selections and Correcting Imperfections
Methods for refining selections and correcting imperfections are critical for achieving accurate results. Techniques include using the Refine Edge tool, adjusting feathering, and using the selection adjustment brush.
- Refine Edge Tool: The Refine Edge tool is a valuable asset for making subtle adjustments to the selection’s boundaries. It is particularly effective in situations with intricate or difficult edges.
- Feathering Adjustments: Modifying the feathering of a selection can dramatically alter the appearance of the edges. Feathering levels are adjusted according to the desired smoothness of the selection.
- Selection Adjustment Brush: The selection adjustment brush allows users to selectively add or remove pixels from the selection, enabling precise adjustments to the selection’s boundaries.
Masking Modes and Applications
Masking modes offer a versatile approach to manipulating images. Understanding these modes is essential for advanced image editing and compositing. The choice of masking mode depends on the desired effect.
- Normal Mode: This is the default masking mode. It blends the mask layer with the underlying layer without any modifications.
- Multiply Mode: This mode darkens the underlying layer, often used for creating shadows or adding depth.
- Screen Mode: This mode lightens the underlying layer, often used for highlighting or adding luminosity.
Color Correction and Adjustment
Color correction in Photoshop is a crucial aspect of image editing, enabling photographers and designers to fine-tune the visual impact of their work. It allows for the enhancement of images by adjusting color balance, contrast, and saturation to achieve specific aesthetics. This process involves manipulating various aspects of the image’s color profile to create a desired visual outcome.
Correcting color casts and inconsistencies, adjusting color palettes, and employing various adjustment layers are fundamental techniques in achieving the intended visual result. Understanding these techniques empowers users to effectively enhance images and produce visually appealing outputs. A solid grasp of color correction principles allows for the creation of images that are not only aesthetically pleasing but also accurate in their representation of the subject matter.
Color Correction Techniques for Specific Color Palettes
Achieving a specific color palette requires a careful consideration of color theory principles. Understanding the relationships between colors allows for the creation of harmonious and visually appealing color schemes. For example, a warm color palette, often associated with comfort and coziness, utilizes hues like reds, oranges, and yellows. Conversely, a cool color palette, associated with calmness and serenity, utilizes blues, greens, and purples. By strategically adjusting color levels, tones, and hues, the desired aesthetic can be achieved.
Different Adjustment Layers and Their Effects
Adjustment layers in Photoshop offer a non-destructive way to modify the colors and tones of an image. These layers allow for modifications without permanently altering the original image data. Using adjustment layers, adjustments can be easily applied, modified, or removed without impacting other image elements. This feature is invaluable for iterative editing and experimentation. Examples of adjustment layers include Levels, Curves, Brightness/Contrast, Hue/Saturation, and Color Balance. Each layer offers unique controls for fine-tuning specific aspects of the image’s color.
Correcting Color Casts and Inconsistencies
Color casts occur when an image exhibits an unnatural tint, often due to variations in lighting conditions or the camera’s white balance settings. Identifying and correcting these casts involves analyzing the image’s color balance and making targeted adjustments. Techniques for correcting color casts often involve using tools like White Balance or Color Balance adjustment layers to neutralize the unwanted tint. Inconsistencies in color can arise from various factors, and they need to be meticulously addressed to ensure a visually unified image. Understanding color temperature, and using tools to compensate for these factors, is vital in achieving accurate and consistent color representation.
Creating and Using Color Profiles
Color profiles define the specific color representation for a particular device or workflow. Understanding and utilizing color profiles is essential for maintaining color accuracy throughout the image editing process. Creating custom color profiles allows for precise control over color reproduction, ensuring that the final output reflects the intended color vision. Different color spaces, such as sRGB and Adobe RGB, offer varying color gamuts. Choosing the appropriate profile is crucial for ensuring accurate color representation across different platforms and devices.
Color Correction Tools and Their Functions
| Tool | Function |
|---|---|
| Levels | Adjusts the tonal range of an image by modifying the input and output levels of the image’s colors. |
| Curves | Provides a more precise method for adjusting tonal values compared to Levels, enabling adjustments along a color curve. |
| Brightness/Contrast | Adjusts the overall brightness and contrast of the image. |
| Hue/Saturation | Adjusts the hue, saturation, and lightness of colors. |
| Color Balance | Adjusts the balance of red, green, and blue colors. |
| Selective Color | Adjusts the specific colors within an image, allowing for fine-grained color correction. |
| Gradient Map | Applies a gradient to the image, modifying the tones and colors based on the gradient’s colors. |
Image Manipulation and Effects
Photoshop offers a wide array of tools for enhancing and transforming images beyond basic adjustments. Mastering these techniques allows for the creation of visually compelling images with unique effects, from subtle enhancements to dramatic transformations. This section explores various methods for achieving these effects, from adding textures and glows to retouching portraits and creating stylized imagery.
Image manipulation is a powerful tool for creative expression in digital photography. Through skillful application of filters, adjustments, and specialized techniques, photographers can produce captivating visuals that transcend the limitations of traditional methods. The key lies in understanding the interplay of different tools and effects, enabling the user to achieve their desired aesthetic outcome.
Creating Special Effects
Applying textures, glows, and shadows are key to enhancing the visual appeal of an image. These effects add depth and interest, taking images beyond simple snapshots. The selection of appropriate textures, glow types, and shadow styles depends on the overall desired mood and artistic intent.
- Adding Textures: Photoshop offers a variety of texture brushes and filters to add a sense of realism or artistic flair. These textures can be applied to specific areas of an image or the entire picture. For instance, a rough stone texture can be used to add realism to a portrait background or a faded parchment texture to create a vintage feel.
- Creating Glows: Glows add a sense of luminosity and highlight certain elements of an image. Different glow types, such as inner glows, outer glows, and color glows, can be used to achieve a variety of effects. For example, an inner glow can add a soft highlight to text or an image’s subject, while an outer glow can draw attention to the edges of a shape or object.
- Adding Shadows: Shadows provide depth and dimension to an image, enhancing its three-dimensional quality. Photoshop allows for the creation of soft, hard, or custom shadows to complement the image’s subject and composition. Employing different shadow types can affect the perceived form and character of an object, like adding a dramatic effect to a landscape or subtly enhancing a portrait’s features.
Using Filters and Adjustments
Filters and adjustments offer a diverse range of transformations for images. Understanding these tools empowers users to create unique artistic styles and achieve specific visual outcomes.
- Applying Filters: Photoshop’s filter gallery provides a wide array of options, ranging from artistic effects to more realistic enhancements. Filters can be used individually or combined to produce complex results. For example, applying a ‘film grain’ filter can simulate the look of vintage photography, or a ‘lens blur’ filter can create a shallow depth of field effect, drawing attention to the subject.
- Adjusting Images: Adjustments allow for fine-tuning of images, such as brightness, contrast, color balance, and saturation. These adjustments offer a way to subtly improve an image or create a dramatic transformation. For example, a color balance adjustment can correct for uneven lighting or a contrast adjustment can make the image’s details more apparent.
Retouching and Enhancing Portraits
Retouching portraits in Photoshop is about enhancing the subject’s appearance while maintaining a natural look. This involves a careful balance of removing imperfections and enhancing features. Professional retouching aims to improve skin tone, remove blemishes, and refine facial features without altering the subject’s natural beauty.
- Skin Tone Enhancement: Tools in Photoshop allow for smooth skin retouching, reducing blemishes and achieving a flawless complexion. These techniques often involve selective adjustments to specific areas, maintaining the skin’s natural texture. Examples include using the Healing Brush tool to seamlessly remove blemishes or the Spot Healing Brush tool for more minor imperfections.
- Facial Feature Refinement: Photoshop allows for subtle adjustments to facial features. This includes techniques like using the Clone Stamp tool to replicate areas of the face or using the Liquify filter to reshape certain features, always with the goal of maintaining a natural aesthetic.
Creating Stylized Images
Photoshop allows for the creation of stylized images with a unique artistic character. This can involve applying specific effects or combining several adjustments to achieve a particular aesthetic.
- Applying Artistic Styles: Photoshop’s filters and adjustments allow for the creation of stylized effects, ranging from abstract patterns to comic book styles. Examples include applying a ‘poster edges’ filter or using a combination of color adjustments and filters to achieve a specific artistic outcome.
Creating a Vintage or Faded Look
Techniques like applying desaturation, adjusting contrast, or adding specific filters can achieve a vintage or faded look. This is achieved through a combination of subtle adjustments.
- Desaturation: Reducing the saturation of colors can create a faded or vintage effect. This technique often involves reducing the vibrancy of colors in the image, which is particularly effective when combined with other techniques.
- Adjusting Contrast and Brightness: Adjusting contrast and brightness can create a sense of aging or fading. Low contrast and reduced brightness can often create a vintage or faded look.
- Adding Grain or Noise: Adding grain or noise can simulate the look of old photographs, contributing to the vintage aesthetic. This technique mimics the imperfections often found in older images.
Advanced Techniques
Beyond the fundamentals, Photoshop offers a wealth of advanced techniques that unlock its true potential. Mastering these methods allows for sophisticated image manipulation, intricate design creation, and the production of high-quality outputs for diverse applications. This section delves into these advanced techniques, focusing on practical applications and real-world examples.
Photoshop’s advanced features extend far beyond basic editing. From integrating 3D models to creating stunning panoramas and intricate composites, Photoshop empowers users to achieve results previously unimaginable. This section explores these sophisticated methods and their applications in professional graphic design and web design.
3D Modeling Integration
Photoshop can seamlessly integrate with 3D modeling software. Users can import 3D models created in other applications and manipulate them within the Photoshop environment. This allows for realistic renderings and compositing of 3D objects with existing images. The process often involves layers, masks, and advanced blending modes to achieve realistic integration. This capability is valuable in product visualization, architectural renderings, and other creative fields.
Panoramic Stitching
Creating high-resolution panoramas is another advanced technique. Photoshop provides tools to stitch multiple overlapping images together, creating a seamless and wide-angle perspective. This process involves aligning and blending the individual images, removing seams, and adjusting perspective for a continuous, high-resolution view. This is crucial for capturing expansive scenes, such as landscapes or large indoor spaces, that would be difficult to capture in a single shot.
Image Compositing
Photoshop excels at image compositing, blending elements from different images to create a unified and compelling final image. Users can combine elements from various sources, layer them precisely, and refine the composite using blending modes, masks, and other tools. This technique is frequently used for creating photorealistic composites, special effects, and visual storytelling. For example, a composite might combine a person in front of a picturesque landscape, seamlessly blending the elements to create a captivating scene.
Web and Graphic Design Applications
Photoshop is an essential tool for web and graphic design. Its advanced tools allow for the creation of high-quality graphics, illustrations, and layouts for websites, logos, marketing materials, and more. The software facilitates precise control over design elements, enabling professional-level results. This includes creating custom shapes, using advanced typography features, and producing vector graphics.
High-Resolution Image Editing
Working with high-resolution images demands advanced techniques. Photoshop’s tools allow for meticulous editing of details, while managing large file sizes efficiently. Advanced features like non-destructive editing and smart objects are vital for maintaining image quality while preserving the original file. Users can utilize these tools to achieve optimal quality and precision when working with high-resolution images.
Custom Actions for Efficiency
Creating custom actions streamlines repetitive tasks in Photoshop. By recording a series of edits as an action, users can automate frequently used procedures. This can save considerable time and effort, particularly when working with multiple images or complex projects. This is an important productivity tool that allows for significant efficiency gains, especially when working on multiple similar projects.
Complex Project Examples
Examples of complex projects in Photoshop include designing a company logo or creating a website banner. These projects demand a combination of graphic design skills, technical proficiency in Photoshop, and an understanding of the intended message and target audience. These projects showcase Photoshop’s versatility and allow users to create visually compelling and effective designs.
Resources and Tutorials
Mastering Photoshop goes beyond the basics. Leveraging the wealth of online resources and tutorials is crucial for consistent improvement and in-depth understanding. This section Artikels essential tools and materials to enhance your Photoshop journey.
Learning Photoshop effectively involves more than just following tutorials. It’s about understanding the underlying principles, identifying your specific needs, and exploring different approaches to achieve desired results.
Online Tutorials and Articles
A plethora of high-quality online tutorials and articles provide a structured learning path. These resources cover various techniques, from fundamental adjustments to advanced image manipulation. They often demonstrate specific steps with accompanying video demonstrations.
- Adobe Photoshop’s official website offers comprehensive tutorials, covering everything from basic image editing to advanced techniques. These tutorials are detailed and often include downloadable assets.
- YouTube channels dedicated to Photoshop provide an excellent platform for learning practical skills through visual demonstrations. These channels often feature tutorials tailored to specific tasks, such as retouching, compositing, and graphic design.
- Websites specializing in graphic design and photography offer a wide array of Photoshop articles, tips, and tricks. These articles provide a deeper understanding of the software’s functionality and creative applications.
Specific Task Resources
Finding resources dedicated to specific tasks or techniques can accelerate learning. This targeted approach focuses on particular challenges or areas of interest.
- For retouching portraits, dedicated tutorials can be found on websites focused on photography and digital art. These resources often provide step-by-step guides to achieve professional-looking results.
- Websites specializing in graphic design provide tutorials and articles on creating logos, banners, and other visual elements. These resources help in mastering design principles within Photoshop.
- For image manipulation, specialized online resources offer guides and techniques to create unique and creative effects. This is crucial for transforming images and adding personalized elements.
Recommended Books and Courses
Books and online courses provide structured learning paths and in-depth knowledge. They offer a comprehensive understanding of Photoshop principles and techniques.
- Books dedicated to Photoshop offer comprehensive coverage of the software’s features and functionalities. These books provide detailed explanations and practical exercises to reinforce learning.
- Online courses from reputable platforms offer structured learning experiences with assessments and certifications. These courses provide structured learning experiences with assessments and certifications, ensuring a comprehensive learning path.
Software Updates and New Features
Staying updated on Photoshop’s latest versions and features is vital for mastering the software’s full potential.
- Adobe frequently releases updates to Photoshop, introducing new features and improvements to existing tools. These updates enhance efficiency and enable new creative possibilities.
- Keeping track of these updates ensures you utilize the most current and efficient features. This allows for a better understanding of the software’s capabilities.
Top Online Resources for Learning Photoshop
This table presents a concise overview of prominent online resources for Photoshop learning.
| Resource | Description |
|---|---|
| Adobe Photoshop Help Center | Official tutorials and documentation. |
| YouTube Channels (e.g., Photoshop Tutorials) | Visual demonstrations and practical tutorials. |
| Behance | Showcase of creative work, providing inspiration and examples. |
| Skillshare | Structured courses and tutorials on diverse design topics. |
Final Summary
In conclusion, Photoshop Essentials provides a robust foundation for image editing. By mastering the tools, techniques, and concepts presented in this guide, you’ll gain the confidence and skills to enhance your images, manipulate them creatively, and ultimately achieve your desired visual outcomes. Explore the vast potential of Photoshop and unlock your full creative potential.


